Tuesday, December 27, 2011 0 comments

Fudge Sauce


This is amazing with ice cream, and one friend likes to dip biscotti in it.

Ingredients:

2/3 C cocoa
2 C sugar
1 can evaporated milk
1 stick butter
1 t vanilla

Directions:

  1. Mix the cocoa and sugar together.
  2. In a saucepan, melt the butter over low heat.
  3. Add the evaporated milk and cocoa/sugar mixture.
  4. Cook, stirring constantly until the sauce comes just to the boil
  5. Remove from heat.
  6. Stir in the vanilla.
  7. Enjoy!
Tuesday, November 29, 2011 0 comments

Chicken and Rice

It doesn't look very colorful but it's quite tasty.
This recipe is based on one from Pierre Franey's The New York Times 60-Minute Gourmet.

I’ve reduced the meat, increased the rice, substantially reduced the fat and replaced the white wine—which I never have on hand—with a good sherry. This recipe works well with roasted broccoli. Although this recipe may sound similar to the chicken, Swiss cheese and rice recipe I posted earlier this year, they taste quite different from each other.

Ingredients:

4 to 5 boneless, skinless chicken thighs
1 T butter
½ C finely chopped white onion
1 clove garlic, put through a press (more if you like, which I definitely do)
½ pound baby bella mushrooms, sliced
1 bay leaf
½ good sherry, not cooking sherry
1 C raw white rice (see notes below if you want to use brown rice)
1 ½ C chicken broth or water

Directions:

  1. In a large skillet that can hold all the chicken pieces in one layer plus the rice, melt the butter over medium heat.
  2. Add the chicken pieces and brown for about 5 minutes.
  3. Turn the chicken, and add the onion, garlic, mushrooms and bay leaf. Make sure these don’t rest on the chicken but are getting sautéed. Cook for another 5 minutes.
  4. Add the sherry and cook until it’s almost all evaporated. You may want to turn the chicken pieces during this bit so they all get a nice bath in the sherry.
  5. Add the rice and broth, and make sure the rice doesn’t rest on top of the chicken pieces.
  6. Cover closely and cook for 20 to 30 minutes over low heat until the rice is done.
  7. Enjoy!

Notes:

  • If you use bone-in chicken, you will need to increase your cooking time in steps 2 and 3.
  • If you use brown rice instead of white rice, you’ll also need to increase the cooking time listed in step 5 to about an hour. You may also need to add extra liquid to the pan.
  • This dish also makes a great side dish if you omit the chicken.
0 comments

Roasted Broccoli


I get tired of steamed vegetables. This is my go-to option for broccoli any more.

Ingredients:

1 head broccoli (or a crown)
Olive oil

Directions:

  1. Preheat the oven to 400F.
  2. Cut the broccoli into flowerets.
  3. Toss with a bit of olive oil. Don’t drown the broccoli—if you have a Misto sprayer, this is the perfect time to use it.
  4. Place on a baking sheet lined with foil (for easier clean-up).
  5. Roast for about 15 minutes.
  6. Enjoy!
Thursday, November 24, 2011 0 comments

Honey-roasted Almonds


Be warned, these won't last long. I made a batch for Saturday night's soiree and they vanished. Then I made a batch yesterday and they lasted about 90 minutes. I'm making another batch today and expect similar results.

Ingredients:

12 ounces raw almonds
2 T honey
2 T water
2 t canola oil
1/4 C sugar
1 1/2 t salt

Directions:
  1. Preheat oven to 325F.
  2. Place the almonds in one layer on a baking sheet and bake for about 20 to 30 minutes until roasted.
  3. While the nuts are roasting, mix the sugar and salt in a bowl large enough to hold all the nuts, and set aside.
  4. About 10 minutes before the almonds are finished, mix the honey, oil and water in a large frying pan and heat almost to boiling.
  5. Add the toasted nuts to the pan. If the liquid hasn't already come to a boil, the heat of the nuts will make it boil. Stir over medium heat until all the liquid is gone.
  6. Put the coated almonds in the bowl with the sugar/salt mixture and stir until the nuts are entirely coated. You may have some extra sugar/salt mixture left over. You can save it for the next batch of nuts (because there will be a next batch).
  7. Enjoy!
Saturday, November 19, 2011 0 comments

Cranberry Sauce


Just in time for Thanksgiving! This recipe is based on a Food & Wine recipe I found about eight years ago. I never liked cranberry sauce until I made this and now I adore it. Serve the sauce warm or at room temperature; you can make this ahead of time and store it refrigerated for up to two weeks.

Ingredients:

½ C port (I've used tawny and ruby port and generally prefer a ruby port)
½ C raspberry juice (cran-raspberry is fine)
12 ounces fresh cranberries
¾ C sugar

Directions:

  1. In a medium saucepan, combine the port and juice and bring to a boil.
  2. Add the cranberries and sugar and simmer over moderately low heat until the sauce is jam-like and most of the berries have popped, about 25 minutes.
  3. Enjoy!
Monday, November 7, 2011 0 comments

Oven Roasted Potatoes


These potatoes cook up easily, require little in the way of prep or attention and you can add carrots, onions, garlic or even nasty turnips or parsnips to them. As pictured, I used just potatoes because I served them with the Sunday Dinner Pot Roast which already had carrots and onions.

Ingredients:

1 pound red potatoes, washed and cut into large chunks
About 2 t olive oil

Directions:

  1. Preheat the oven to 350F.
  2. Line a jelly roll pan with foil and spray with cooking spray.
  3. Toss the potato chunks with the olive oil until they are lightly coated.
  4. Place the potato chunks on the pan and bake for an hour, stirring every 15 minutes.
  5. Add salt and pepper at the table
  6. Enjoy!
0 comments

Sunday Dinner Pot Roast


I never actually made pot roast as a Sunday dinner but you could, very easily. Actually you can make this for dinner almost any day you have about 30 minutes of prep time in the morning. Your slow cooker does the rest.

Ingredients:

2 ½ pounds beef or chuck roast
2 T flour
2 T olive oil
1 medium onion, coarsely chopped (I prefer white onions)
6 to 8 baby bella mushrooms, quartered
1 C carrots, peeled and diced into large chunks
4 cloves garlic, put through a press
1 sprig fresh rosemary or 1 t dried rosemary
Several sprigs of thyme—strip the leaves into the slow cooker OR 1 t dried thyme
2-3 T tomato paste
1 28-ounce can diced tomatoes; reserve some of the juice in a small bowl
2 C red wine, like Merlot (boxed is fine)

Directions:

  1. In a sauté pan, heat the oil over medium heat.
  2. Put the roast into a large plastic bag along with the flour. Keeping the bag closed, shake the bag until the roast is lightly coated with the flour.
  3. Sauté the roast in the pan until browned on all sides.
  4. Meanwhile, put the onions, carrots and garlic into your slow cooker.
  5. When the meat is browned, place it on top of the mixture in the slow cooker.
  6. Add the mushrooms to the sauté pan and sauté until done.
  7. Put the mushrooms in the slow cooker.
  8. Add the herbs.
  9. Add the tomatoes and all the juice except what you’ve put in the small bowl.
  10. Stir the tomato paste into the reserved tomato juice and then add to the slow cooker.
  11. Cook on high for about six hours or on low for eight to ten hours.
  12. Cut the meat into pieces and serve with the juices and veggies and possibly the roasted potatoes.
  13. Enjoy!
Friday, November 4, 2011 0 comments

Fra Diavolo Sauce


A week or so ago, Kent enjoyed a Fra Diavolo shrimp dish at a restaurant and decided to create his own version. So he took a basic tomato sauce recipe we love (created by Oyster Evangelist) and tweaked it to come up with his own version.

When I made this the other night, I had some chicken sage sausage on hand so I diced that up and sautéed it and added it in. The sauce is equally good with no meat—it’s got lots of flavor all by itself. Cut down the red pepper flakes and the cayenne if you don’t like things hot.

Ingredients:

4 T (1/2 stick) butter
1 small onion, minced (1 cup)
2 t red pepper flakes
1 t cayenne powder
1/4 teaspoon dried oregano
2 tablespoons tomato paste
1/2 C water
2 cloves garlic, put through a press
1 32-ounce can crushed tomatoes and their juices

Directions:

  1. In a large heavy pan, melt the butter.
  2. Add the onion, red pepper flakes, cayenne powder and oregano, and cook, stirring frequently, until the onions are soft, about 10 minutes.
  3. Add the tomato paste and cook a few minutes until it begins to stick to the bottom of the pan. 
  4. Stir in 1/2 cup of water, scraping the bottom of the pan to pick up any cooked-on bits. 
  5. Add the tomatoes and the garlic.
  6. Simmer for 30 minutes.
  7. Put on your favorite pasta.
  8. Enjoy!
Wednesday, November 2, 2011 1 comments

YOAK-O-LOCO Chili


This is my scratch recipe. "YOAKO-O-LOCO". It's easy to make. Dont let the 30 ingredients throw you off. You probably have most of these ingredients on hand. The Chili has a Tex-Mex flair, with sweet Midwest Barbecue notes. It has a nice finsihing heat, but nothing that sends you rushing for the milk. I made this at Hope Presbyterian Church's Harvest Day Festival and it took 1st place. I hope you enjoy it. Happy simmering!

Ingerdients:
6 ounces hot turkey italian sausage
1 pound ground sirloin
3/4 pound pork tenderloin (pre cooked to medium then cubed in 1/2 inch pieces)
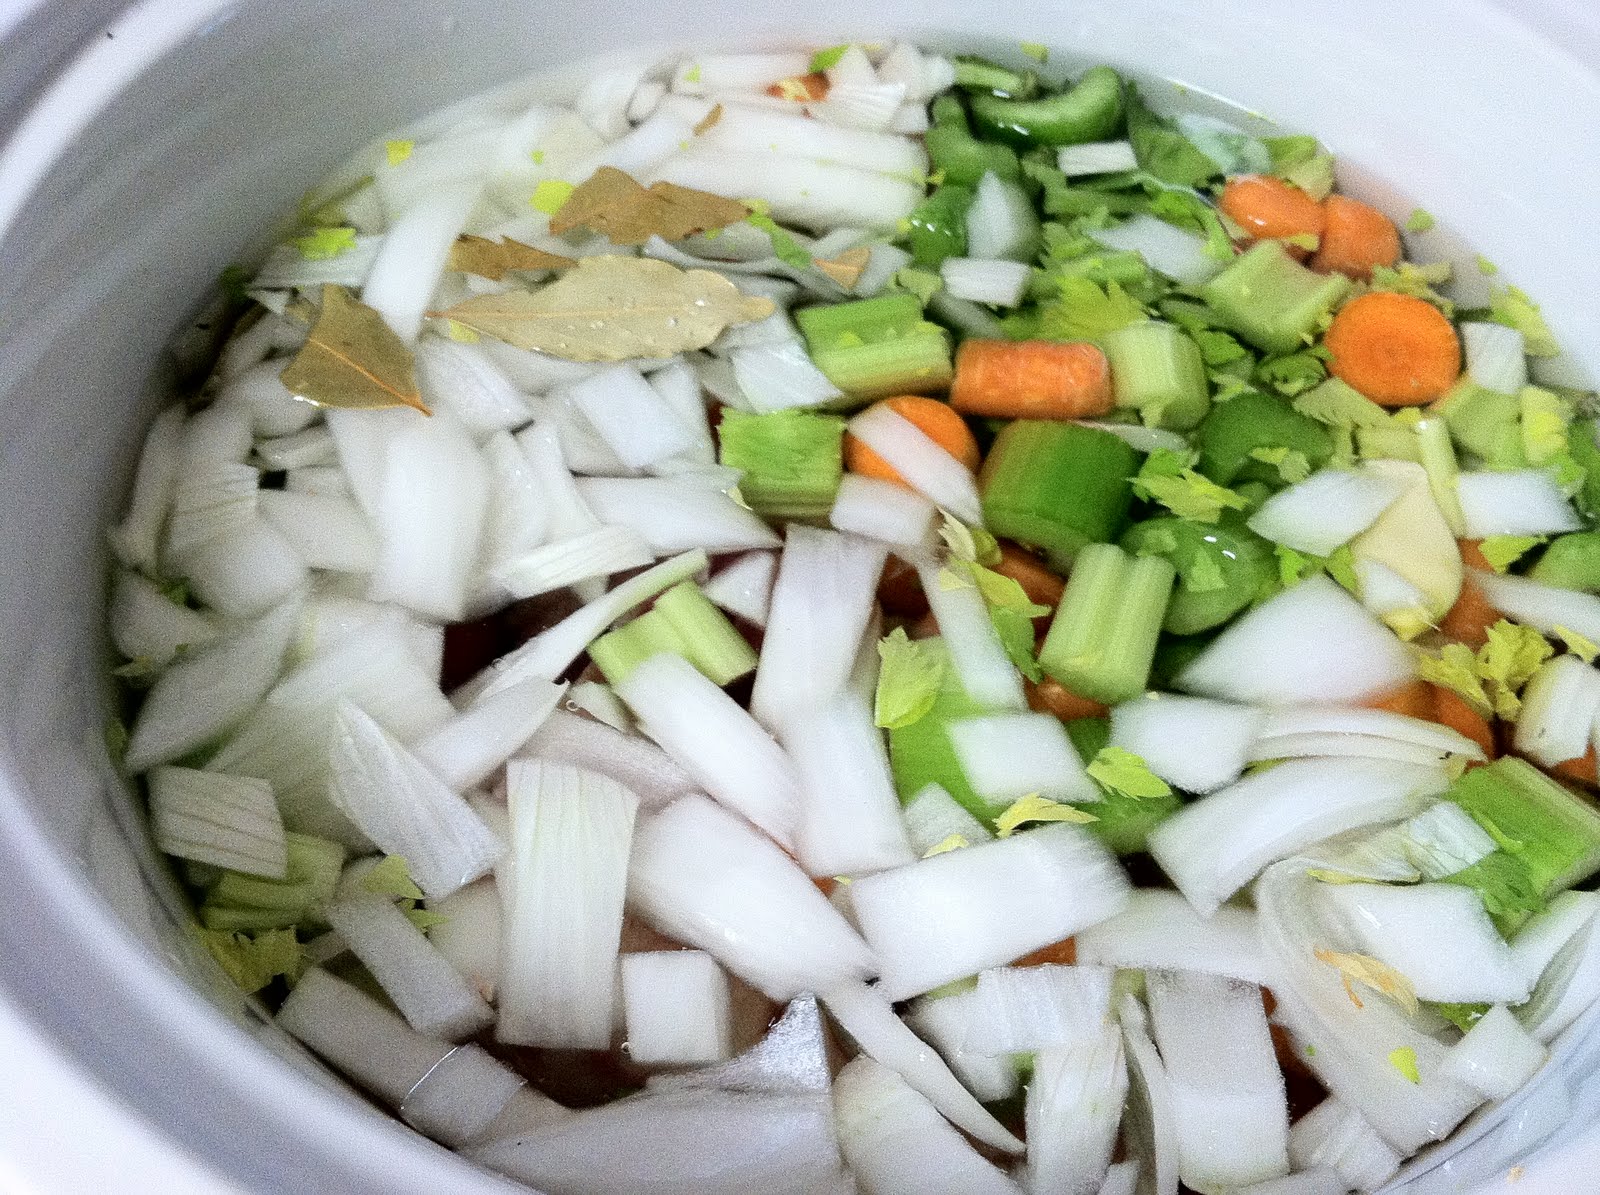
2 cups chopped onion
1 cup chopped green bell pepper
8 garlic cloves, minced
1/3 cup bacon fat
1 jalapeño pepper, chopped
2 tablespoons chili powder
2 tablespoons brown sugar
1 1/2 tablespoon ground cumin
3 tablespoons tomato paste
1 teaspoon dried oregano
1/2 teaspoon freshly ground black pepper
1/4 teaspoon salt
1/8 teaspoon Smoked Paprika
2 bay leaves
1/8 teaspoon rosemary
1 1/4 cups Merlot or other fruity red wine
1/4 cup Heinz ketchup
1/8 cup Sweet Baby Ray’s barbecue sauce (you can sub this for your favorite)
1/4 cup beer (your favorite brand will do)
1/2 cup beef broth
1/4 teaspoon ground cinnamon
2 (28-ounce) cans whole tomatoes, undrained and coarsely chopped
1 (15-ounce) cans kidney beans, drained
1 (15-ounce) cans black beans, drained
1 (15-ounce) cans pinto beans, drained
1 (15 ounce) can diced tomatoes undrained
2 ounces of unsweetened dark chocolate


Preparation:


  1. Heat a large Dutch oven over medium-high heat. Remove casings from sausage. Add sausage, ground sirloin, pork loin, onion, and the next 4 ingredients (onion through jalapeño) to pan; cook 8 minutes or until sausage and beef are browned, stirring to crumble.


  2. Add chili powder and the next 7 ingredients (chili powder through bay leaves), and cook for 1 minute, stirring constantly.


  3. Stir in wine, ketchup, and 8 ingredients through pinto beans; bring to a boil. Cover, reduce heat, and simmer 1 1/2 hours, stirring occasionally.


  4. Uncover and add diced tomatoes and unsweetened dark chocolate and cook for 30 minutes, stirring occasionally. Discard the bay leaves.


  5. Note: Like most chilis, this version tastes even better the next day. Best if slow heated on the stove top, avoid the microwave.


  6. Garnish: shredded reduced-fat sharp cheddar cheese sour cream diced white onion
Tuesday, November 1, 2011 1 comments

Ben's Beefy Chili


This chili is a bit different than the ordinary beans, tomatoes, and no-flavor chili's that many people make. This chili has loads of tex-mex flavor, a complex taste, and some nice back-heat.

Ingredients:
4 tablespoons olive oil
1 lb bottom round beef, cut into cubes
1 lb ground beef
1/4 lb Italian sausage or ground pork
salt and pepper
1 tablespoon cumin
1 bottle (12 oz) of a nice dark beer like Guinness
2 tablespoons finely chopped semi-sweet dark chocolate
1 can black beans
1 can kidney beans
1 can pinto beans
1 large red onion diced
4 gloves garlic finely chopped
1 Poblano seeded and finely chopped
2-3 Chipotle peppers packed in adobe sauce (less if you want this to be less spicy)
1 teaspoon Ancho chili powder
1 teaspoon New Mexico Chili powder
1 teaspoon Adobe seasoning
2 cups homemade chicken stock
1 can (16 oz) whole tomatoes, pureed (don't drain)
2 tablespoons real maple syrup

Directions:
  1. Heat 3 tablespoons olive oil in a dutch oven type pan.
  2. Season the cubed steak with salt, pepper, and brown all the sides of the steak.
  3. Sprinkle the steak with the cumin and stir.
  4. Deglaze the pan with the beer, bring to a boil, then add the chocolate, let reduce.
  5. In a separate pan, brown the pork and ground beef.
  6. In a separate pot heat 1 tablespoon of the oil and caramelize the red onion.
  7. Add the garlic and cook 2 minutes.
  8. Add the Poblano pepper and cook another 2 minutes.
  9. In a food processor, combine the tomatoes, Ancho chili powder, New Mexico chili powder, Adobe seasoning, onion/garlic/Poblano mixture, Chipotle peppers, and the reduced beer mixture.
  10. Puree this mixture.
  11. Add the mole type mixture you just made to the beef, pork, and steak.
  12. Add the beans.
  13. Add the chicken stock (I used homemade chicken stock so it is unsalted, at this point I add another 2 teaspoons salt, just taste it and see if it needs it)
  14. Add the maple syrup.
  15. Stir and put in a dutch oven or crock pot and let simmer for an hour or two, or longer. It will just become thicker the longer you let it go.
  16. Enjoy!
I made this for a chili cook off we were having at Church, it got 2nd place and as you can see below, this is what happened to the pot I took it in:

Tuesday, October 25, 2011 0 comments

Pumpkin Pie Ice-Cream


This ice-cream is amazing. It seriously tastes just like pumpkin pie. If you don't like pumpkin pie, it's not for you! The key to this ice-cream is using fresh pumpkin, not from a can.

Ingredients:
1 3/4 cup fresh pumpkin puree (you can substitute 1 15 oz can of pumpkin puree)
1 1/2 cups heavy cream
1/2 white sugar
1/4 brown sugar
1/2 teaspoon salt
1 teaspoon cinnamon
1/4 teaspoon ginger
1/4 teaspoon nutmeg
1/4 teaspoon ground cloves

Directions:
  1. If you are going to use fresh pumpkin puree get a pie pumpkin from the store. Cook the pumpkin. I do this in my vegetable/rice steamer. After you cook the pumpkin puree it in a food processor.
  2. Then put puree in cheese cloth and then into a colander for about 15 minutes to drain the extra water.
  3. Heat cream, white sugar, and brown sugar in a sauce pan until it barely begins to bubble, stiring constantly, do not let it boil.
  4. Remove sweetened cream from heat and let cool to room temperature.
  5. Beat pumpkin puree, sweetened cream, salt, and the spices for 3 minutes on medium-high speed.
  6. Pour mixture into your ice-cream maker and turn on for about 30 minutes or following the directions of your particular machine (add some walnuts if you want a bit of a crunch).
  7. Enjoy!

2 comments

White Pizza with Portabella Muschrooms


I don't normally like vegetarian pizza. But this is filling and delicious. Try this and you won't even notice that there isn't meat on it.

Ingredients:
Pizza dough
2 portabella mushroom caps
2 cups fresh mozzarella cheese
1/4 cup feta cheese
1/4 cup olive oil
lots of garlic
1 teaspoon rosemary
1/2 teaspoon oregano
1 teaspoon Italian seasoning

Directions:
  1. First, the white sauce: Mix 1/4 cup olive oil with about 1 teaspoon rosemary, 1/2 teapoon oregano, and 1 teaspoon Italian seasoning. Add about 2 cloves of crushed garlic. Stir and let sit. This can sit days if you want. But an hour is probably the minimum for it to infuse the olive oil with flavor.
  2. Preheat oven to 450 degrees.
  3. On a piece of foil put a small bulb of garlic. Let this roast for about 20-30 minutes.
  4. Stretch out your dough on a pizza sheet. Poke holes in it with a fork to prevent big bubbles.
  5. Cook dough for 5 minutes at 450 degrees.
  6. Remove dough from oven and set aside.
  7. Saute portabella mushrooms in olive oil until tender.
  8. Now assemble the pizza.
  9. Evenly spread the infused olive oil over the pre-cooked dough.
  10. Spread about 2 cups of freshly grated mozzarella on the pizza.
  11. Add the mushrooms, roasted garlic, and feta cheese. You can also add some Parmesan.
  12. Cook pizza for 7 minutes on a pizza pan.
  13. Then cook for an additional 3 minutes with the pizza directly on the oven rack.
  14. Enjoy!
Tuesday, October 18, 2011 1 comments

BBQ Chicken Pizza


This pizza is a classic! It's great with thin or regular crust and makes great left-overs.

Ingredients:
Pizza Dough
BBQ Sauce (I prefer Sweet Baby Ray's BBQ Sauce, but just choose one you like)
Red Onion (caramelized, I do this by putting the diced onion in my cast-iron pan with about 3 tbl of olive oil. This takes about 20-30 minutes. You can put raw onion on instead if you like, but the caramelized onion gives the pizza a nice smokey flavor.)
Chicken (cooked)
2 Cups mozzarella cheese
Parmesan cheese
1/2 cup fresh cilantro

Directions:
  1. Make pizza dough.
  2. Preheat oven to 450 degrees.
  3. Spread dough out on your pizza pan.
  4. Pre-cook dough for 4-5 minutes.
  5. Remove from the oven and cover dough with bbq sauce.
  6. Place chicken liberally over the pizza.
  7. Cover with mozzarella cheese.
  8. Rough chop your cilantro.
  9. Sprinkle the cilantro over the pizza.
  10. Add some Parmesan cheese.
  11. Cook in the oven for 10 minutes or until the cheese is bubbly and the edges of the crust are browning.
  12. Enjoy!
0 comments

Beef Broth

I know. It doesn't sound exciting. Who wants to make beef broth? Great food begins with great ingredients. Making your own broth is an excellent way to have the best tasting food around. Follow these easy steps and your way to some savory broth (And for you official people this is more like a stock than a broth, still tastes good...).

Ingredients:
3 beef marrow bones (or any other beef parts, feet, ect.)
Stalk of celery
6 carrots
1 large onion
pinch of salt
2-3 bay leaves
2 cloves garlic
8 cups water

Directions:
  1. Chop celery and carrots.
  2. Add marrow bones, vegetables, and the rest of the ingredients to a crock pot.
  3. Cook for 8-12 hours. The more it cooks the more it will concentrate the flavor. As you cook it water will steam off which means the flavor is being condensed into an ever decreasing amount of water.
  4. Let cool.
  5. Strain out the big pieces using a colander.
  6. Filter the broth by running it through something that can remove the remaining little pieces.
  7. Using a baster put broth into ice cube trays.
  8. Freeze.
  9. You now have 1 oz pre measured frozen beef broth ready to use anytime!
  10. Enjoy by using this for French Onion soup!
Tuesday, October 11, 2011 0 comments

Crusty French Bread


This bread is great tasting, pretty quick and goes perfect with salad, soup, or to make garlic bread with.

Ingredients:
2 cups warm water
1 tablespoon yeast
1 tablespoon vegetable oil
1 tablespoon sugar
2 teaspoons salt
5 cups bread flour

Directions:
  1. Dissolve yeast, warm water, and sugar in bowl.
  2. Let sit for 10 minutes, until bubbly.
  3. Add salt, oil, 3 cups flour, blend for about 2 minutes
  4. Add 2 more cups of flour to make the dough stiffer
  5. Knead for 10 minutes
  6. Put in greased bowl, cover, and let rise til doubled
  7. Divide dough in half and shape into two long rolls (like french bread!)
  8. Take a knife and cut diagonal slices on the top, just through the top of the dough
  9. Sprinkle with cornmeal
  10. Let rise again until doubled
  11. Bake at 375 degrees for 30 minutes
  12. If you want really 'crusty' crust you can spray the dough with water while baking
  13. Enjoy!
Thursday, October 6, 2011 1 comments

Amazing Tomato Soup


I love soup for lunch when the weather gets cooler, which tends to happen early in Boston. Last week I made tomato soup very loosely based on a recipe from Food & Wine. This is a quick soup and is ready in less than an hour from start to finish. It makes four to five servings as written.

Here’s a tip—you don’t need to peel your garlic cloves before you put them through your press. In fact if you don’t peel them, your press will be a lot easier to clean up.

Finally, I almost never add salt and pepper while cooking something. I prefer to add them at the table.

Ingredients:

1 T butter
1 T olive oil
1 small or ½ medium white onion, finely diced
2 cloves garlic, put through a press
2 t smoked paprika (it makes a difference to the taste so get smoked paprika)
1 28-ounce can diced tomatoes (I prefer fire roasted tomatoes)
3 T tomato paste
1 ½ C water
1/3 C light cream
1 sprig of thyme until the thyme plant dies, then use about ½ t dried thyme
1 bay leaf

Directions:
  1. Melt the butter and oil together in a pan large enough to hold all the ingredients.
  2. Add the finely diced onion and garlic to the pan and sauté until tender and translucent, about five minutes.
  3. Add the paprika and stir well.
  4. Add the tomatoes with their juice, the tomato paste, the water, the thyme and bay leaf.
  5. Stir well and simmer for about 15 to 30 minutes.
  6. Remove from heat and stir in the cream.
  7. Enjoy!
Sunday, October 2, 2011 1 comments

Curried Rice with Chicken


Originally this recipe was called Curry Glazed Chicken and it didn’t have rice or vegetables in it at all. But I have no problem with altering recipes both to provide more complete nutrition and also to stay within a budget. Meat tends to be pretty expensive compared to vegetables and rice and so this recipe morphed into a mostly meatless main dish.

Also a word about spices—don’t buy into the hype that you must replace all your spices every three days or something silly like that. If you can still taste the flavor, why would you replace your spices? Plus spices aren’t always cheap. We’ve found that if you shop the ethnic aisle of your supermarket you can often find what you need for less than the same product housed in the spice aisle. And don’t overlook online sources. We get a lot of ours from Herbco, including the curry powder I use in this recipe.

As written, this recipe serves two. You can easily double it though.

Ingredients:

1 C cooked rice (I use brown rice and steam it outside in my trusty steamer)
1 boneless, skinless chicken thigh, cooked (sauté it, bake it, microwave it—whatever works for you) and diced
1 inch cube of fresh ginger, peeled and finely diced
¼ C honey
1 T Dijon style mustard
2 T curry powder (adjust for your own taste buds—remember, we like it hot)
½ white onion, coarsely chopped
1/3 C frozen peas
1 small or ½ medium carrot, peeled and diced. Note: I omitted the carrot this particular day because I served the Spicy Carrot Salad with it.
1 T canola oil

Directions:

  1. Heat the oil in a saucepan large enough to hold all the ingredients. Sauté the chopped onion.
  2. Meanwhile, in a microwave proof bowl, mix the honey, mustard and curry powder together. Heat in the microwave until the honey is fairly runny.
  3. (If you are using carrots, add them to the saucepan and continue cooking until cooked through, probably about five minutes.)
  4. Add the ginger and continue to sauté.
  5. Add the peas and chicken and heat thoroughly. If the pan gets a bit dry or things are sticking too much, add a little water or a bit more oil.
  6. Add the rice and the sauce.
  7. Mix thoroughly and let the sauce heat through.
  8. Enjoy!
Friday, September 30, 2011 2 comments

Spicy Carrot Salad


The kittiesx3 household adores spicy food—the spicier the better. And this dish is spicy. It’s also ridiculously tasty and very nutritious too. Let’s put it this way. One person in my home dislikes carrots but makes an utter pig of himself when I serve this dish. I’m lucky to get any.

Ingredients:

4—5 carrots, peeled and shredded in a food processor or by microplane
Pinch each of salt and sugar
1 T canola oil
1 t cumin seeds
1 t dry mustard seeds
1 t sesame seeds
½ t cumin
¼ t hot red pepper powder (we make it with ½ t and it is HOT)
2 T fresh cilantro, chopped
1 t fresh lime juice (substitute lemon if that’s what you have on hand)

Directions:

  1. Add the pinches of salt and sugar to the shredded carrots, mix and set aside.
  2. In a saucepan, heat the oil and add the cumin, dry mustard and sesame seeds. Heat until the sesame seeds begin to pop. Remove from heat.
  3. Add the cumin, hot red pepper powder to the saucepan and stir.
  4. Stir in the chopped cilantro and lime juice.
  5. Add the mixture from the saucepan to the shredded carrots and mix well.
  6. Chill.
  7. Enjoy!
Thursday, September 29, 2011 0 comments

Sliced Baked Potatoes--Two Versions!

Version 1


Version 2
How do you find new recipes? I find a lot of mine while eating out or surfing the web. I ran across an image for this recipe a couple of weeks ago on Pinterest (if you want an invitation, let me know). Well I like potatoes, and these seemed pretty interesting so I thought I’d give it a try. We tend to go meatless a couple of days a week and this looked like a hearty, meatless entrée to me.

I googled sliced baked potatoes and found a handful of recipes so I sort of combined them all together to create my own.

Be warned, my version isn’t a hands-off recipe. You’ll need to tend to your potatoes about every 10 minutes until they are cooked.

Ingredients:

2 large baking potatoes, scrubbed and with the skin on
4 T butter, melted
½ C shredded cheese, your choice (I use cheddar/jack cheese from Costco)
Italian seasoning to taste

Directions:


Version 1
  1. Preheat the oven to 400F.
  2. Place two wooden spoons on a cutting board about as far apart as your potatoes are wide. Use the handles to hold your potato in place as you slice the potatoes and to keep you from slicing all the way through. You want the bottom of the potato to remain intact. Also, slice thinly—my slices are about ¼ inch wide.
  3. Place the sliced potatoes in a baking pan. I use cooking spray only because I wanted an easier clean up session afterwards.
  4. Carefully open your sliced potatoes and drizzle the melted butter across them. Don’t worry when it runs out the sides—you will be basting the potatoes with this butter throughout the cooking process.
  5. Sprinkle the Italian seasoning on the potatoes and try to get some inside the slices.
  6. Bake for a total of 60 minutes. Important! About every 10 minutes, pull the potatoes out and re-baste with the butter. Also turn them over. That will let all the skin get a butter bath.
  7. After 60 minutes, remove from the oven.
  8. Sprinkle the shredded cheese over the potatoes and return to the oven for about 10 minutes.
  9. When done, place each potato in a shallow bowl. Pour the remaining melted butter over the potatoes.
  10. Enjoy!

Version 2

  1. Preheat the oven to 400F.
  2. Slice the potatoes into thin slices, preferably about ¼ inch wide.
  3. Pour about half of the melted butter into a large baking dish (9x13) that’s been sprayed with cooking spray. Tilt the pan around until you’ve coated the entire bottom of the pan.
  4. Place the sliced potatoes in the so that the slices are in no more than two layers. Ideally you want just one layer of potatoes.
  5. Drizzle the melted butter across the slices.
  6. Sprinkle the Italian seasoning on the slices.
  7. Bake for about 60 minutes. About every 15 minutes, pull the potatoes out and flip them. This helps a lot with ensuring the potatoes brown evenly.
  8. After 60 minutes, remove from the oven and sprinkle the shredded cheese over the potatoes. Bake for another five minutes or until the cheese is all melted.
  9. Serve with sour cream if you feel decadent.
  10. Enjoy!
Wednesday, September 28, 2011 1 comments

Cream of Garlic Soup


I was watching the show The Best Thing I Ever Ate and they were talking about the best garlic dishes they have ever had. Someone on there showed this amazing looking garlic soup. I thought to my self, I must try that. So after looking over different garlic soup recipes on the web this is what I came up with.

This soup had the most amazing sweet garlic flavor you can imagine. It's not pungent garlic, but sweet. In other words, you won't sweat garlic for the next year after eating this. But, if you don't like garlic, I mean really like garlic, you may just want to pass on this one.

Ingredients:
3/4 cup of garlic cloves
3 tablespoon olive oil
2 1/2 cups chicken broth
1 cup vermouth (you can substitute any white wine)
2 1/2 cups whole milk
1 cup heavy cream
1/2 cup peeled potatoes (some recipes use bread cubes instead, could be worth a shot)
Croutons

Directions:
  1. Mash garlic into a paste. I use my mortar and pestle, but a food processor would work.
  2. Add garlic and oil to your pot and cook garlic until it begins to color, stir often. Don't burn it!
  3. Add chicken broth and vermouth.
  4. Bring to a boil and then simmer for about 30 minutes.
  5. Add milk, cream, and potatoes and simmer for an additional 30 minutes.
  6. Enjoy the smell of garlic that has not permeated your home!
  7. Puree soup in a blender and then return to your pot to simmer.
  8. Simmer for another 30 minutes or longer.
  9. Ladle into a bowl and top with croutons.
  10. Enjoy!
0 comments

Croutons!


So if you have some bread (maybe even some you made from a recipe on this site!) that has gotten a bit stale, you should make croutons. These are simple, take so little time, and are a great way to get the most out of bread.

Ingredients:
Bread
Oil
Seasonings

Directions:
  1. Cut the bread into cubes.
  2. Put bread into a bowl and put olive oil over the bread.
  3. Season the croutons. I like to use a high quality seasoned salt and some parsley. You could do parsley and garlic salt for Italian style, or anyway that sounds good to you.
  4. Preheat oven to 400 degrees.
  5. Spread bread out on cookie sheet.
  6. Cook for 10 minutes and then stir the bread.
  7. Continue cooking until the bread cubes have a bit of a crunch to them. They should brown some, but not burn.
  8. Enjoy!
0 comments

No-Knead Bread


This style of bread hit the food world a few years ago and was made famous by the NY Times article on it. If you have never tried this, you really should, it is extremely easy and has fantastic results. The bread is airey and crusty and a perfect compliment to many meals.

Ingredients:
3 cups flour
1/4 teaspoon yeast
1 1/4 teaspoon salt
1 5/8 cup of water

Directions:

  1. Mix flour, yeast, salt, and water in a bowl.
  2. Cover and let sit for 12-18 hours.
  3. Dough will be bubbly on top when ready.
  4. Remove from bowl with a spatula onto a floured surface.
  5. Shape dough into a ball. Use only enough flour to keep it from sticking to your hands.
  6. Generously flour a towel. Put dough on towel.
  7. Let rise for 2 hours, should double in size.
  8. Preheat oven to 450 degrees.
  9. Place cast-iron or similar pot in oven to heat.
  10. After pot and oven are heated plop the dough in the pot.
  11. Cover and cook for 30 minutes.
  12. Uncover and cook for an additional 15 minutes.
  13. Enjoy!

Friday, September 23, 2011 1 comments

Macaroni and Cheese


When Ben was little, I bowed to the tyranny of a two year old and made mac & cheese from the blue box. But honestly that stuff is expensive and full of strange ingredients. Plus I dislike using canned soups a great deal. In fact, you could say I downright hate it. Fortunately this mac & cheese recipe doesn’t need any cans of anything.

Ingredients:

2 cups pasta (we prefer gemelli but if you like elbow macaroni, have at it)
4 T butter
¼ C all-purpose flour
3 C milk
2 C shredded semi-hard cheese (cheddar, Gouda, Monterey Jack—whatever you have on hand and feel free to mix it up)
Salt and freshly ground pepper
2/3 C freshly grated Parmigiano-Reggiano cheese

Directions:
  1. Preheat the broiler.
  2. Cook your pasta OR follow my "no humidity added to the house" method below. Drain well.
  3. In a medium saucepan, melt the butter over low heat.
  4. Whisk in the flour until a paste forms.
  5. Gradually whisk in the milk until smooth.
  6. Bring the sauce to the boil over moderately high heat, stirring or whisking constantly, until thickened.
  7. Remove the pan from the heat and add in the shredded cheeses until melted (not the Parmigiano-Reggiano just yet).
  8. Season with salt and pepper.
  9. Stir in the cooked pasta and then put the mixture into a 9 x 13 glass or ceramic baking pan.
  10. Top with the Parmigiano-Reggiano cheese.
  11. Broil about four inches from the heat for about four minutes or until richly browned.
  12. Let the dish sit for about five minutes before serving.
  13. Enjoy!

*Bonus no humidity method for cooking pasta:
  1. Bring the water to the boil in a covered saucepan.
  2. Add the pasta, cover and immediately turn off the heat.
  3. Let sit, covered, on the stove for 20 minutes.
  4. Drain and enjoy your humidity-free home.
Caveat: Angel hair pasta doesn’t really need the full 20 minutes and gemelli may take up to 25 minutes.
Monday, September 19, 2011 0 comments

Penne Pasta with Smoked Salmon and Caper Cream Sauce


I love smoking food. One of my favorite thing to smoke is salmon. Something about the fatty fish just is perfect with smokey flavor. Up until recently there was only one dish I would use smoked salmon in; a dip (I'll post a recipe for my irresistible smoked salmon dip soon enough). But this creamy pasta dish works perfect with smoked salmon. Even though this dish breaks a few culinary rules you'll find that it is lip smacking good!

Ingredients:
1/4 cup extra-virgin olive oil
1 small onion, chopped
1/2 pound smoked salmon, chopped (I smoke this myself, it is cured before hand as well, but that's another post)
1 cup heavy cream (a.k.a. whipping cream)
1-2 tablespoons capers, drained
Salt and freshly ground black pepper to taste (if you smoke your own salmon, I'd skip the salt)
1 pound pasta, cooked al dente, drained (reserving about 1/4 cup of the cooking water)
Freshly grated Parmesan cheese
1 lemon

Directions:
  1. Cook your pasta
  2. In a large skilled add your olive oil and onions. Cook the onions til they are translucent, but not brown.
  3. Pour in the cream and the capers. Heat an additional 1-2 minutes.
  4. Combine sauce and pasta.
  5. Add the pasta water you reserved.
  6. Sprinkle your serving with (gasp!) Parmeasan cheese.
  7. Squeeze some lemon juice over the top of your portion.
  8. Enjoy!
0 comments

Roasted Garlic Focaccia Bread


I love garlic! And roasted garlic is sweet and savory. This is a simple, easy bread recipe that is bursting with flavor and is great for sandwiches, or as a side for any pasta or Italian dish.

Ingredients:
15-20 cloves of garlic peeled and roasted
1 c warm water
1 tbsp active yeast
1 tsp salt
1 tsp sugar
1 tsp oregano
1 tsp thyme
1 tsp rosemary
1 tsp basil
1 tbsp olive oil + more to brush over
2 c flour + some for kneading

Directions:
  1. Roast your garlic by peeling the cloves and putting it in a ball of foil. Roast for about 45 minutes at 350F.
  2. Activate yeast in a bowl by combing year, water, salt, sugar, and herbs. Wait 10 minutes or until bubbly.
  3. Add olive oil, garlic, and flour. Add enough flour so you can get it out of the bowl. But keep it as sticky as you can.
  4. Knead on a floured surface for a few minutes, adding flour as needed.
  5. Put dough in a greased (with olive oil) bowl. Turn to coat the dough.
  6. Let rise for 30 minutes or until doubled.
  7. Coat a cookie sheet (preferably with raised edges) with oil.
  8. Press dough onto sheet spreading it evenly.
  9. Brush olive oil on top and let rise again for about 20 minutes.
  10. Bake at 400F for 18-20 minutes or until the top is beginning to be browned.
  11. Enjoy!
(A wonderful panini made with this bread)
Thursday, September 8, 2011 1 comments

Corn Salad


We like to eat out, probably a little too much, but here in the South End of Boston we’ve got a lot of great restaurant choices. This summer, we’ve gone to Tremont 647 several times and I got absolutely hooked on what they call Local Corn and Tomato Salad. Their version uses just sherry vinegar as a dressing, but I didn’t have any at home. So I used a bit of balsamic vinaigrette instead and it worked well too.

Basically you’ll want to have equal parts of the corn, cherry tomatoes and cucumbers; as written, this recipe serves two people.

Ingredients:

2 ears of corn, cooked, cooled and cut off the cob
½ C cherry tomatoes, quartered
1 small or ½ large cucumber, peeled, seeded, quartered and diced
¼ C red onion, coarsely diced
2 T feta cheese, crumbled
1 T light balsamic vinaigrette (I love Paul Newman’s Own Lighten Up Balsamic Vinaigrette)

Directions:
  1. In a bowl, mix the corn, tomatoes and cucumber together. You want these proportions to be fairly equal so add in more if you need to.
  2. Mix in the onion and feta cheese.
  3. Drizzle the vinaigrette over the dressing but be sparing. It’s not the point of the salad.
  4. Toss and serve.
Also this worked as left-overs for a couple of days but I wouldn't want it after that. Things just get too soggy.
Tuesday, September 6, 2011 2 comments

Chicken and Swiss Cheese Casserole


When Ben was growing up, I made a lot of chicken and rice dishes. A lot. So when he hit his teen years, he basically refused to eat them anymore. Now that he’s an adult, he's come to love those dishes and has even asked for a few of the recipes, including this one.

A few words before I get to the recipe: You can make your rice on the stove if you prefer, but I live in a “garden” apartment (that’s basement to the rest of the world) and I don’t need any more humidity in the house. So I use my rice steamer outside on the patio. That means my rice doesn’t get cooked with the herbs and onions in it, but it turns out just fine anyway. If you want to know the full, make it on the stove and then put it in the oven version, let me know in the comments.

Ingredients:

Casserole
2 T butter
1 medium onion, chopped
1 clove of garlic, either minced or put through a garlic press
3 C cooked rice (I use brown rice)
1/8 C sherry or white wine (not cooking wine) or vermouth
Water or broth to deglaze the pan
1 bay leaf
2 t dried thyme or about 1 t fresh
1 ½ C cooked, diced chicken
6 to 8 ounces shredded Swiss cheese

Topping
2 T butter
1 T flour
1/3 C milk
Paprika to sprinkle

Directions:

Casserole
  1. Preheat the oven to 350F.
  2. Melt the butter in a large heavy skillet.
  3. Sauté the onion and garlic in the butter until the onion is clear.
  4. Add the sherry or white wine or vermouth and enough water or broth to deglaze the pan.
  5. Add the diced chicken and heat thoroughly.
  6. Quickly combine the chicken mixture, cooked rice and Swiss cheese and put into a large greased casserole pan.
Topping
  1. Melt the butter in a small pan over low heat.
  2. Stir in the flour ensuring you have no lumps.
  3. Slowly add the milk and stir constantly until thickened.
  4. Pour over the casserole and sprinkle the top with paprika.
  5. Cover and bake about 20 minutes.
I made this last night and fed four adults and two children. I foolishly thought we would have leftovers today. I was wrong.
0 comments

Brownies


My brownie recipe is based on a recipe from my grandmother—what makes them so yummy is all the buttery goodness along with the surprise of miniature chocolate chips.

Ingredients:

2 squares (1 ounce each) unsweetened chocolate
1 stick butter (not margarine)
1 C sugar
2 eggs
1 t vanilla
¾ C all-purpose flour
½ t baking powder
½ C chocolate chips (I prefer the miniature ones)

Directions:

  1. Preheat oven to 350F.
  2. In a saucepan, heat chocolate squares and butter over very low heat. Stir while melting and once melted, remove from heat.
  3. Mix in the sugar, then the eggs.
  4. Blend the flour and baking powder together and then add to the mixture in the saucepan.
  5. Add the chocolate chips.
  6. Pour into a greased baking pan, about 8x8x2 inches (I use a Pyrex glass pan).
  7. Bake for 25 minutes; test with a toothpick. The toothpick should come out clean while the brownies still look a bit moist. This is good.
  8. Let cool and then cut into 16 pieces.
Of course you can always eat more than one piece at a time.
Sunday, September 4, 2011 0 comments

Watermelon Martini


This is a great summer treat when you have an abundance of watermelon and want to try something new and refreshing. This martini drinks easy, is not overly sweet and is very satisfying on a hot day.

Ingredients:
1 cup fresh squeezed watermelon juice
4 oz Vodka
1/4 cup simple syrup (this is just equal parts sugar and water heated til they are mixed)
1 juiced lime
sugar
salt
ice

Directions:
  1. Juice watermelon til you have 1 cup
  2. Mix salt and sugar in equal proportions in a plate
  3. Take a piece of watermelon and run it over the rim of your glass
  4. Put glass on salted/sugared plate to coat the rim
  5. Fill glass with ice
  6. In a cocktail mixer (or two glasses put opening to opening) fill with ice, watermelon juice, vodka, syrup, and lime juice.
  7. Shake very well.
  8. Pour into glass
  9. Garnish with a piece of watermelon or mint.
  10. Enjoy!
Thursday, September 1, 2011 0 comments

Tuscan Chicken Marinara


Ingredients:
6 to 8 Boneless Chicken Thighs (May substitue Boneless Chicken Breasts)
1 Large Green Bell Pepper
1 Large Yellow Onion
1 Medium Zuchini
1 Quart Fresh Marinara (your favorite jar brand will do too)
1 1/2 Tbs Fresh Garlic (4 Cloves or Minced Jar)
1/4 Cup EVOO (Extra Virgin Olive Oil)
1/4 Cup Merlot Wine
3 Cups Whole Wheat Pasta
1 Tsp Salt
1 Tsp Pepper
1 Tsp Dried Basil
1/4 Cup Parmesan (ground or flaked)

Directions:
  1. Pre-Heat oven to 375 degrees F.
  2. Set a large pot of water to boil on high heat
  3. Place a large 12" to 14" skillet on Med Hi Heat
  4. Pour in EVOO and allow to heat for about 30 seconds
  5. Place Chicken "shiny" side down in oil
  6. Season with Salt, Pepper, and Dried Basil and sautee' for 2 mins
  7. Flip Chicken and season this side with Salt, Pepper, Dried Basil and sautee' for 2mins
  8. Flip chicken 2 more times sauteeing for 1 min on each side
  9. By this time your water should be boiling add your Penne Pasta
  10. Remove chicken to an oven safe pan or dish and place in the oven for 10 minutes
  11. Deglaze the fry pan using the 1/4 cup Merlot on med high heat (scrape the morsels)
  12. Add to deglazed pan Onions, Green Bell Peppers, Zuchini and Fresh Garlic sautee for 3 mins
  13. Add Marinara and turn heat to MED to simmer
  14. When timer for chicken rings remove chicken and place into your Marinara continue to simmer
  15. When pasta is finished to liking (I prefer al dente' with this dish) remove and drain
  16. Sprinkle cooked penne with EVOO and toss
  17. Plate 3/4 Cup Penne as a "bed" setting
  18. Place 1 of your Chicken Thighs on bed of Penne
  19. Then Spoon on 1 Cup of Marinara
  20. Garnish with Dried Basil and Parmesan

DELICIOSO!
0 comments

Fantastic French Onion Soup


French Onion soup is great for two reasons; it is full of flavor and it requires very little ingredients. If you have onions and broth on hand you can have one of the most flavorful soups out there for dinner. This recipe serves two people. Double or triple if you are serving more.

Ingredients:
3 medium sized yellow or white onions (don't use sweet onions)
1/2 teaspoon sugar
1/4 cup Vermouth, Sherry, or dry White Wine
Olive Oil
4 cups beef broth or chicken broth or a mixture of both (I prefer 3 cups beef and 1 cup chicken)
1/2 teaspoon thyme
1 bay leaf
crusty bread
cheese (mozzarella, swiss or provolone works best)

Directions:
  1. Cut onions into thin half rings.
  2. In a large pot over medium to medium-high heat caramelize the onions in olive oil.
  3. After about 10 minutes add the sugar to enhance the caramelization.
  4. Continue cooking the onions for 20 more minutes or until they are carmelized.
  5. When the onions are carmelized (slightly brown, don't burn them!) add the broth, Vermouth, thyme, bay leaf and partially cover.
  6. Let simmer for 30 minutes to an hour so the flavors are well mixed.
  7. Ladle the soup into a bowl.
  8. Put a piece of crusty bread (it can be stale) on top of the soup, put your cheese on top.
  9. Broil in the oven until the cheese is melted.
  10. Enjoy!


Tuesday, August 30, 2011 0 comments

Italian Feast Pizza


Want some pizza that is full of flavor, not greasy, but fills you up? Try this filling Italian Feast Pizza recipe. This is one of my favorite pizzas, it's the ultimate pizza for a bunch of guys sitting around watching a football game.

Ingredients:
1 batch of my Perfect Pizza Dough recipe (use 1/2 a batch if you want to make thin crust)
Pepperoni
Italian Sausage (about a 1/4 lbs)
1 Green Pepper
1/2 Onion
2 cups Mozzarella
Feta Cheese
Pizza Sauce
Italian Seasoning
Garlic Powder

Directions:
  1. Preheat the oven to 450°
  2. Dice your Green Pepper and Onion
  3. Work the dough onto greased pizza pan
  4. Using a fork, poke holes all over in the dough
  5. Once the oven is preheated, put the dough in the oven for 5 minutes
  6. Remove from the oven and spread about 3/4 cup of pizza sauce over the dough
  7. Add the mozzarella
  8. Add your Green Pepper and Onion
  9. Add little chunks of the Italian Sausage (this is uncooked sausage, this will cook completely and is food safe)
  10. Add the pepperoni
  11. Add the feta cheese (about 1/4 cup)
  12. Sprinkle with Garlic Powder and Italian Seasoning
  13. Put in the oven for 10 minutes til the crust browns some and the cheese is melted.
  14. Enjoy!

0 comments

Pizzeria Cheese Sticks

Everyone loves cheese sticks! I worked a local pizza shop in College and learned the tricks to make irresistible cheese sticks that the whole family will love.


Ingredients:
Half a batch of my Perfect Pizza Dough recipe
Mozzarella cheese (use a block of whole milk mozzarella and cut off slices with a knife about 10 slices, or use about a cup of shredded mozzarella.)
2 tablespoons of melted butter
Garlic Powder
Italian Seasoning

Directions:
  1. Stretch out the dough on a greased pizza pan.
  2. Brush melted butter over the uncooked dough.
  3. Spread cheese over the dough.
  4. Sprinkle with garlic powder and italian seasoning.
  5. Bake at 450° for about 6 minutes, just until the cheese is melted but before the dough gets brown.
  6. Cut into slices and enjoy by dipping into some pizza sauce!
  7. Enjoy!
0 comments

Perfect Pizza Dough


Pizza dough is easy to make and it is exponentially better than anything premade. Follow these simple steps and you'll have perfect dough every time.

Ingredients:
3 cups flour (bread flour if you have it)
1 tablespoon sugar
1 teaspoon salt
3 tablespoons oil (canola works best, don't use olive oil)
2 tablespoons honey
1 packet dry active yeast (or 2 1/4 teaspoons)
1 cup warm water

Directions:
  1. In a kitchen aid (or in a bowl using a wooden spoon to mix) combine flour, sugar, salt, oil, honey, and yeast. Add the water and mix til combined. The dough should be slightly sticky but not so much that you can't get it off the bowl or your fingers. Add more flour if necessary.
  2. Knead the dough for a few minutes.
  3. Put dough back in the mixing bowl and cover.
  4. Let rise for an hour (or more!)
  5. Work dough with hands in a circular motion to stretch it out to the size of your pizza pan. If you're brave, try the pizza toss! The spinning motion stretches the dough out to size while maintaining a perfect circle.
  6. Enjoy!
0 comments

Grilled BBQ Hawaiin Pork Chops

Don't let the "messy" or the "sticky" fool you. These are worth every juicy bite!


Ingredients:
6 to 10 half inch cut Smithfield Bone In Pork Chops (Smithfield because they are the best.)
1 Quart of your favorite BBQ Sauce (I reccomend Stubs bold and spicy, Thanks Ben!
1 Can of Dole Sliced Pineapple Rings
1 Red Apple
1 Sweet Yellow Onion
1/2 Cup Salt
1/2 Cup Sugar
1 Tsp Granulated Garlic
1 Tsp Black Pepper
1 Bay Leaf
Cold Water


Directions:

  1. Place Boneless Pork Chops in a bowl or dish deep enough to have at least 1/2 of water over the tops of the chops.
  2. Slice both the apple and onion with skin on uinto quarters and add to bowl.
  3. Add Salt, Sugar, Granulated Garlic, Black Pepper, and Bayleaf evenly over the bowl.
  4. Poor enough water over the chops, and seasoning to cover the stack by a half inch
  5. Using your clean hand or a spoon mix together the mixture and chops. You just made a brine
  6. Cover bowl with plastic wrap thoroughly almost as air tight as you can get it
  7. Place the brine in teh refrigerator a minimum of 6 hours. (I let my sit over night)
  8. When your ready to cook take the chops out and drain on paper towels for about 1 min.
  9. Prep BBQ Sauce and Pinapples for grilling
  10. With Grill on High or 'HOT" Grill Pork Chops without Sauce for 1 minute on each side
  11. Slather Chops with BBQ Sauce and Flip cook for 1 minute.
  12. Flip Chops and Repeat step 11 a 5 times.
  13. Place Pineapple Rings on Grill to get a little char for 45 secs.
  14. Remove Chops to tray and Place freshly grilled pineapple rings on top.

I like to serve these with rice and grilled corn, DELICIOUS!

ENJOY!

1 comments

Hurricane Hamburgers

So we lost power with hurricane Irene and still don't have it back on yet. I must say, my wife and I miss cooking. Something about having hot, delicious food is the essence of good living. Wise words in Ecclesiastes 2:24 sum this point up well, "There is nothing better for a person than that he should eat and drink and find enjoyment in his toil. This also, I saw, is from the hand of God"

Our generator powered fridge contained some ground beef. So, naturally, we decided to grill.

My approach with something like burgers is 'simple is best'. I've seen tons of recipes where you put lots of things in the beef and it basically becomes a meatloaf burger. I think the best burger is one where you keep it simple and let the beef shine.

Ingredients:
1 lbs of ground beef (80/20, get the best quality you can, like angus)
2 tablespoon of butter
salt
pepper

Directions:
  1. Form your patties. I like to use 1/4 lbs per burger, but you could make them smaller or even do sliders if you prefer. To form the patties, I like to put the meat in a bowl and then put another bowl on top. Press down and it should form a very nice, uniform patty.
  2. Melt you butter.
  3. Brush butter on the tops of the formed patties.
  4. Add salt and pepper to your burgers. Or you can add a good quality seasoned salt. My preference is to not add a bunch of 'grill' seasonings. Again, let the burger be a burger. I want my burger to taste like good beef not some pre-mixed seasoning. Salt and pepper will do the trick.
  5. Grill burgers for 5-7 minutes on each side depending on your grill and how done you want them (160 °F is food safe temperature for beef). Don't open the grill except when you turn the burgers. Don't press down or smash the patties, and don't turn them more than once! When you do turn the burgers, feel free to splash on a generous amount of melted butter again!
  6. Take burger off grill, put on a bun with your favorite toppings and enjoy!

Remember, just because you don't have power doesn't mean you can't eat great! I'm thinking tonight I'll get out the smoker and do some salmon!


Tuesday, August 23, 2011 0 comments

Mexican Corn Jalapeno Taco Quesadilla


This is an easy to make and deliciously quick appetizer.

Ingerdients:
1 10 inch Flour Tortilla
1/2 Cup Shredded Mild or Sharp Cheddar Cheese (Jack or Fresco Cheese is also good)
1/2 Cup Browned Ground Beef (I prefer to season thsi beef with a Taco Seasoning Packet)
18 to 20 Slices of Jalapeno Pepper (For this recipe I prefer Mt. Olive Brand Jar Slices)
1/4 Cup Corn Kernels
1/2 Cup Tomato based Salsa of choice
1 tsp Butter or Margerine
1/4 Cup Sour Cream
1/8 tsp Paprika (I prefer Smoked Paprika for a kick)
1/8 tsp Cumin
1/8 tsp Granulated Garlic
Salt and Pepper

Fun Tip!: "Think of the preparation steps as if you were building a pizza!"

Directions:
  1. Spread butter evenly on 1 side of tortilla
  2. Place large skillet on Medium High and allow to preheat for 45 secs
  3. Place tortilla buttered side down on skillet
  4. Sprinkle evenly your Cheese or Cheeses over the tortilla.
  5. As the cheese begins to melt add Seasoned Ground Beef evenly over the tortilla
  6. Sprinkle Corn Kernels evenly over the tortilla
  7. Place Sliced Jalapenos like evenly over the tortilla
  8. Using a tablespoon sprinkle and slather 1/4 cup of your Toamto Salsa over the tortilla
  9. Pinch or Sprinkle Paprika, Cumin and Garlic over the tortilla
  10. Salt and Pepper to taste
  11. As tortilla turns a golden brown using your spatula fold the torilla in half
  12. Flip the Quesadilla as needed till you see that the cheese is now soft and melted
  13. When grilled to liking place Quesadilla on cutting board and slice into 6 even pieces
  14. Place 6 slices on pplate and garnish with Paprika Spinkles and Jalapeno
  15. Add small cups of Sour Cream and Salsa and serve warm

ENJOY!
0 comments

Simple Classic Margarita

Looking for a simple classic margarita that you can easily make at home? This is the drink for you. Homemade margarita's are great and they have way less calories than if made from a mix. The homemade ones don't have the syrupy taste you get from mixes. Once you try this classic margarita you won't go back to mixes!


Ingredients:
2 oz Tequila
3 tablespoons Triple Sec
2 tablespoons fresh squeezed lime juice/or 1 lime
This makes one drink.

Directions:
  1. If you have a mixer, you know what to do! If you don't have a mixer fill a tall glass with ice.
  2. Juice your lime and add it to the iced cup.
  3. Add your triple sec and tequila. Again, if you don't have a drink mixer take another class of the same size and put them opening to opening.
  4. Shake well for 10-15 seconds (this lets some ice crystals form).
  5. Pour into a margarita glass full of ice.

For extra flavor take a lime and wet the edge of the glass, then coat with salt by pouring some salt onto a plate and rubbing the wetted glass edge on the salted plate. You can always adjust this recipe to taste. The key is the ratio of lime juice to triple sec.

Monday, August 22, 2011 1 comments

Best Ever Homemade Buns


Want an artisan quality bun for your gourmet burger, sandwich, or bbq? Try this easy fail-proof recipe out:

Ingredients:
1 1/2 cups warm milk (use whole milk if you have it!)
1 teaspoon yeast
1/2 teaspoon salt
2 tablespoons sugar
1 egg
1/3 cup oil (canola works fine)
4 cups flour (bread flour is preferred, the higher gluten content of bread flour means it will be more like store-bought bread.)

Directions:
  1. In a large mixing bowl, combine milk, yeast, salt, sugar, egg, and oil. Let sit five minutes.
  2. Add one cup of flour at a time until dough becomes more ball like but still sticky.
  3. Add a little more flour and begin kneading.
  4. Continue adding flour and kneading until the dough is smooth and elastic.
  5. Let dough rise in a greased, covered bowl until doubled, about an hour.
  6. Shape into hamburger or hot dog buns. The dough should make about 8-10 buns, but it's up to you how big you want them. Brush egg white over the tops if you want to add sesame seeds, minced garlic, or sauteed minced onions.
  7. Let rise again about 30 minutes.
  8. Bake for 20 minutes at 350 degrees.
  9. Let cool completely then cut in half.

These buns are WOW! Great texture, just like the store, but with the freshness you can only get with homemade bread. You can also freeze these. I'd cut them in half before you freeze them to make for easier enjoyment. Simply pull them out of the freezer a few hours before you want to eat them and they'll be nice and fresh tasting.

P.S. the picture above has my North Carolina style smoked pork. I'll do a post on that soon!
 
;